Red White and Blue Rock Candy
June 30, 2013
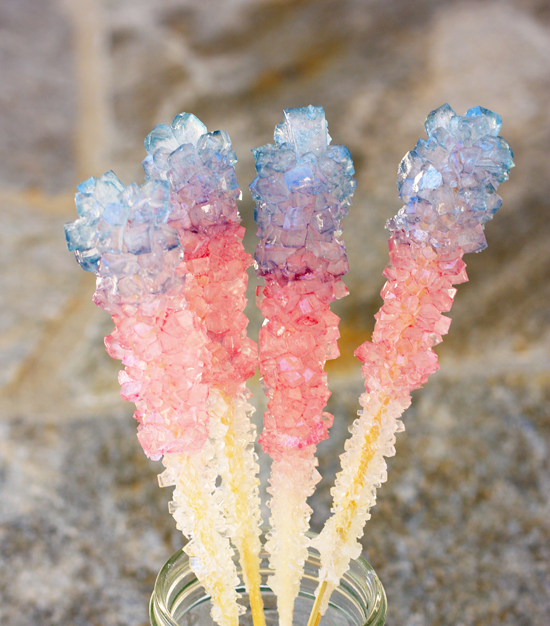
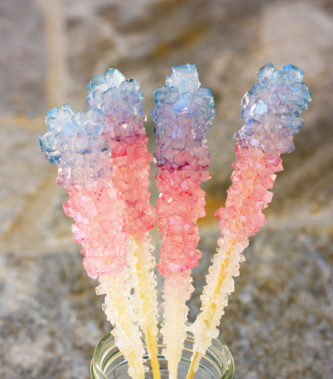
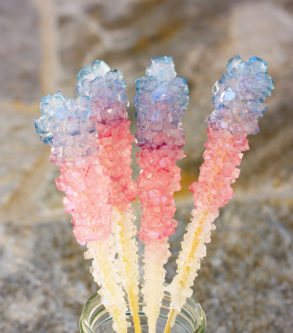
I am very excited to share this candy. I love getting into the spirit of holidays and have been thinking for quite a while about making fun red, white, blue candy for the Fourth of July. While the lollipops I made are fun and easy to make, these were my real inspiration for this year’s festivities. Red, white, and blue rock candy. These have been growing on my windowsill for more than a week now and I have to say I am thrilled with how they came out. The end result looks like a sparkler adding to the festive nature of the candy, and the colors came out beautifully.
This is the first time I have made rock candy since I was a kid making it for a science project and I have to admit I am a bit obsessed now. I placed my jars on my kitchen window sill and it was so fun watching the crystals grow. They can be flavored or colored in any way, but I have to admit it is the crystal structure that really fascinates me. The basic way to grow rock candy is to make a supersaturated sugar solution, let it cool slightly and then place a stick coated with seed crystals in the solution. The crystals then grown on the stick making the rock candy. To make the three colored candy I let the white crystals grow then removed them from the solution, recooked it with more sugar and added the next color. This allowed me to make the red layer but it also had an unintended effect that I find fascinating. It turns out that if you place already grown rock candy into another supersaturated solution you get giant sugar crystals. Each time you do it they seem to get bigger! Now I want to do a science experiment with my kids to see just how big we can get the crystals to grow. (I may have to wait until they are a bit older though, at this point they seem much more interested in knowing when they can eat the candy than they are in the crystal properties of sugar.) Science aside, these are just a fun way to celebrate the Fourth of July or any other holiday. I already have plans to make other colors for other occasions.
A quick note about the colors. I made these using natural colors which is why the colors are a bit subdued. If you want them to be really bold and bright, and are ok using regular food coloring, I recommend using the gel type food colorings used for cake decorating to get the brightest colors. The darker the sugar solution is the more color the finished crystals will have. With the natural colors if the mixture is too dark it can make the finished product taste funny but that shouldn’t be a problem with the gel food colorings since they are so much more concentrated.
Recipe Updates – Delivered Fresh!
Related Recipes
Red White and Blue Rock Candy
June 30, 2013
Ingredients & Instructions
Ingredients & Quantities
- 4 wooden skewers
- clothespins
- 2 narrow mouthed quart sized jars
- sugar for coating the skewers
For white layer
- 8 cups (60 oz) sugar
- 3 cups water
- 1/2 teaspoon concentrated candy flavoring (optional)
For red layer
- 2 cups (15 oz) sugar
- red food coloring
For blue layer
- 3 cups (22.5 oz) sugar
- 3/4 cup (6 oz) water
- blue food coloring
Preparation Instructions
Cut the sharp tips off the wooden skewers. Throughly wet the skewers and coat 3/4 of the skewers completely in sugar. Leave the top part or each skewer unsugared. Set them aside so they can dry.
Combine the sugar and water for the white layer in a medium saucepan. Cook over medium high heat, stirring occasionally, until the mixture comes to a boil and looks clear. While the mixture is coming to a boil it is a good idea to brush down the sides of the pan with a wet pastry brush to make sure that all the sugar crystals are throughly dissolved. Remove the pan from the heat and gently stir in the flavoring. Pour the mixture into the two jars and let stand until just warm.
Clip the clothes pins to the unsugared part of the skewers and gently place two skewers in each jar. The skewers should not be touching the sides or bottom of the jar or each other. (The easiest way to make sure they are hanging down the right amount is to test them in an empty jar before placing them in the jar with the solution.) The clothes pins should balance on the top of the jar keeping them skewers suspended. Carefully place the jars in a sunny place where they will not be disturbed and let the crystals grow for one week.
Remove the rock candy from solution (there may be a crust over the top that needs to be broken in order to remove them) and place them on a drying rack set over a cookie sheet. Wash the jars out with hot water to remove any crystals that might have formed on the bottom of the jar.
Pour the sugar syrup back into the pan and add the additional sugar for the red layer. Cook over medium high heat, stirring occasionally, until the mixture comes to a boil and looks clear. While the mixture is coming to a boil it is a good idea to brush down the sides of the pan with a wet pastry brush to make sure that all the sugar crystals are throughly dissolved. Remove the pan from the heat and gently stir in the red coloring. The solution needs to be fairly dark for the finished crystals to show the color. Pour the mixture into the two jars, filling each one only 2/3 full and let stand until just warm. (There may be a bit extra red syrup. This can be placed in a smaller jar and used to grow another red rock candy if desired). Place the rock candy back in the solution, making sure that 1/3 of the candy is above the level of the solution. Place the jars in a sunny place where they won’t be disturbed and let stand for one or two days.
Remove the rock candy from solution (there may be a crust over the top that needs to be broken in order to remove them) and place them on a drying rack set over a cookie sheet. Pour out the solution and wash the jars out with hot water to remove any crystals that might have formed on the bottom of the jar. (The leftover syrup can be made into hard candy or lollipops if desired, I will post that recipe soon.)
Place the sugar and water for the blue layer in a medium sauce pan. Cook over medium high heat, stirring occasionally, until the mixture comes to a boil and looks clear. While the mixture is coming to a boil it is a good idea to brush down the sides of the pan with a wet pastry brush to make sure that all the sugar crystals are throughly dissolved. Remove the pan from the heat and gently stir in the blue coloring. The solution should be quite dark. Pour the mixture into the two jars and let stand until just warm. Each jar should be about 1/3 full. Place the rock candy in the jars, making sure half of the red is above the level of the solution. Let the crystals grow for one or two days.
Remove the rock candy from solution (there may be a crust over the top that needs to be broken in order to remove them) and place them on a drying rack set over a cookie sheet. When they are dry store them in an airtight container or wrap them in cellophane bags (dipped pretzel bags are a great size and shape for these).
Recipe Details
Recipe Times
Prep
N/A
Cook
N/A
Total
N/A
Recipe Yield
4
Recipe Categories

Red White and Blue Rock Candy
June 30, 2013
Recipe Details
Recipe Yield
4
Prep Time
N/A
Cook Time
N/A
Total Time
N/A
Ingredients & Quantities
- 4 wooden skewers
- clothespins
- 2 narrow mouthed quart sized jars
- sugar for coating the skewers
For white layer
- 8 cups (60 oz) sugar
- 3 cups water
- 1/2 teaspoon concentrated candy flavoring (optional)
For red layer
- 2 cups (15 oz) sugar
- red food coloring
For blue layer
- 3 cups (22.5 oz) sugar
- 3/4 cup (6 oz) water
- blue food coloring
Preparation & Cooking
Preparation
Cut the sharp tips off the wooden skewers. Throughly wet the skewers and coat 3/4 of the skewers completely in sugar. Leave the top part or each skewer unsugared. Set them aside so they can dry.
Combine the sugar and water for the white layer in a medium saucepan. Cook over medium high heat, stirring occasionally, until the mixture comes to a boil and looks clear. While the mixture is coming to a boil it is a good idea to brush down the sides of the pan with a wet pastry brush to make sure that all the sugar crystals are throughly dissolved. Remove the pan from the heat and gently stir in the flavoring. Pour the mixture into the two jars and let stand until just warm.
Clip the clothes pins to the unsugared part of the skewers and gently place two skewers in each jar. The skewers should not be touching the sides or bottom of the jar or each other. (The easiest way to make sure they are hanging down the right amount is to test them in an empty jar before placing them in the jar with the solution.) The clothes pins should balance on the top of the jar keeping them skewers suspended. Carefully place the jars in a sunny place where they will not be disturbed and let the crystals grow for one week.
Remove the rock candy from solution (there may be a crust over the top that needs to be broken in order to remove them) and place them on a drying rack set over a cookie sheet. Wash the jars out with hot water to remove any crystals that might have formed on the bottom of the jar.
Pour the sugar syrup back into the pan and add the additional sugar for the red layer. Cook over medium high heat, stirring occasionally, until the mixture comes to a boil and looks clear. While the mixture is coming to a boil it is a good idea to brush down the sides of the pan with a wet pastry brush to make sure that all the sugar crystals are throughly dissolved. Remove the pan from the heat and gently stir in the red coloring. The solution needs to be fairly dark for the finished crystals to show the color. Pour the mixture into the two jars, filling each one only 2/3 full and let stand until just warm. (There may be a bit extra red syrup. This can be placed in a smaller jar and used to grow another red rock candy if desired). Place the rock candy back in the solution, making sure that 1/3 of the candy is above the level of the solution. Place the jars in a sunny place where they won’t be disturbed and let stand for one or two days.
Remove the rock candy from solution (there may be a crust over the top that needs to be broken in order to remove them) and place them on a drying rack set over a cookie sheet. Pour out the solution and wash the jars out with hot water to remove any crystals that might have formed on the bottom of the jar. (The leftover syrup can be made into hard candy or lollipops if desired, I will post that recipe soon.)
Place the sugar and water for the blue layer in a medium sauce pan. Cook over medium high heat, stirring occasionally, until the mixture comes to a boil and looks clear. While the mixture is coming to a boil it is a good idea to brush down the sides of the pan with a wet pastry brush to make sure that all the sugar crystals are throughly dissolved. Remove the pan from the heat and gently stir in the blue coloring. The solution should be quite dark. Pour the mixture into the two jars and let stand until just warm. Each jar should be about 1/3 full. Place the rock candy in the jars, making sure half of the red is above the level of the solution. Let the crystals grow for one or two days.
Remove the rock candy from solution (there may be a crust over the top that needs to be broken in order to remove them) and place them on a drying rack set over a cookie sheet. When they are dry store them in an airtight container or wrap them in cellophane bags (dipped pretzel bags are a great size and shape for these).
Thank You For Printing This Recipe! Visit Us Again Soon!
Recipe Page: https://www.couldntbeparve.com/recipe/red-white-and-blue-rock-candy/


These are so much fun!! The kids will love it!
These are undeniably pretty, and if you’re doing a science experiment, I can definitely see it, but over six pounds of sugar for four sticks of rock candy?! I’m all for homemade stuff, but only when it seems worth the time, effort, and expense. Am I missing something here?
It is true that it uses a lot of sugar. Much of the sugar stays in the syrup since only a small amount is able to crystalize out onto the sticks. I used the syrup leftover from making the rock candy to make both lollipops and other hard candy so it didn’t go to waste (I will post the method for those later this week). In terms of effort and expense I felt it was worth it because I have never seen three colored rock candy before and I liked that twist, and I like making candy without the artificial colors if my kids are going to eat it. I also buy my sugar in bulk which keeps the expense down. Whether or not something homemade is worth the trouble is definitely up to individual preferences so I can see that making these might not be for everyone.
My grandchildren are coming for 5 days. I cannot wait to make these with them. They will super super love this!
these are amazing, they look so cool and this is such a great activity to do with kids.
these are so pretty! i remember making rock candy as a kid and loving it!
So pretty! I love that you used natural colors for this.
what a project! beautiful!
Tie-dyed rock candy! Awesome!
These are amazing! I love that you made them red white and blue, its so cool. I have never made rock candy before, but I definitely should!
So cute and creative!
These are gorgeous, and I love that they don’t look so bright and unnatural. I never made this in science class and I know my 9 year old would love to do this. I can’t wait to make it with him.
These are so gorgeous! I always wondered how they made rock candy!