Chocolate Caramel Cups
June 1, 2014
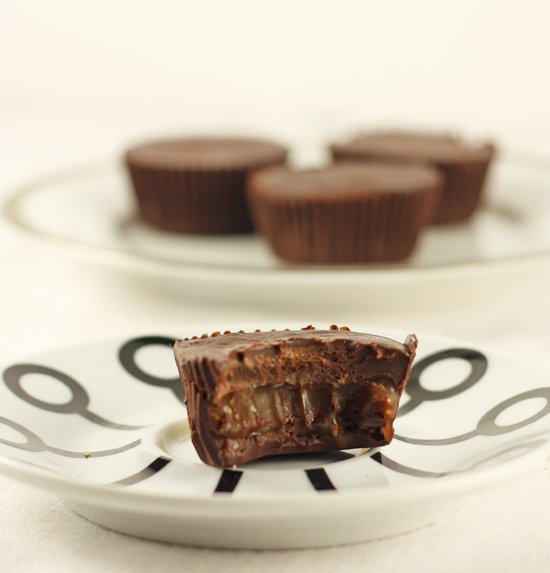
There are some types of recipes that are very easy to make dairy-free. Some (like marshmallows, my favorite) don’t require dairy at all. Others (like many cookies) only need simple substitution of ingredients and you have a delicious dairy-free version of your favorite treat. Then there are recipes that are much much more difficult. A simple substitution isn’t going to yield good enough results. These are the recipes that require many attempts and lots of tinkering before they finally taste good enough to serve. Things like vanilla ice cream or cheesecake, where both the flavor and texture is dependent on the dairy products you have removed. These are recipes I love to tackle, using all the tricks in the book to make a dairy free version that is every bit as delicious as the original.
Caramel is one of these difficult ones. I have been trying for years to perfect a non-dairy caramel and I think I finally have gotten it. I previously had perfected a non-dairy caramel recipe I loved, but it called for non-dairy creamer, an ingredient I have not been willing to use in years. It has taken me many many tries to come up with an all natural version that is worthy of being called caramel. Here it finally is.
There are many non-dairy caramel recipes out there that call for coconut milk instead of cream. That is a great substitution in ganache and I wanted to love it in caramel but I found that batch after batch I made had a bit of a strange sour aftertaste. Something about cooking coconut milk to those temperatures made it less than pleasing to my taste. It was ok, but not great. Then I stumbled on the answer. I was attempting to convert the apple cider caramels from the Smitten Kitchen cookbook to parve. They call for a large amount of butter and cream so I decided to use just the cream part of the coconut milk as a substitute for both of those. The end result was very strange (It tasted both coconut-y and apple-y which in this case was not a good thing) but I loved the texture and mouthfeel of the caramel. I decided to try again, not with the apple caramels, but using just the coconut cream to make a caramel, and the results were delicious. It turns out that the sour flavor I had noticed is in the milk part of the coconut milk, not the cream part. I finally have a parve caramel I love! You can expect to see more caramel recipes coming down the pike, it is a whole new world of possibilities for me!
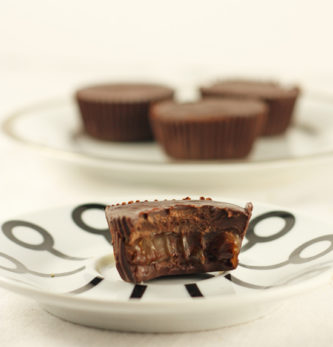
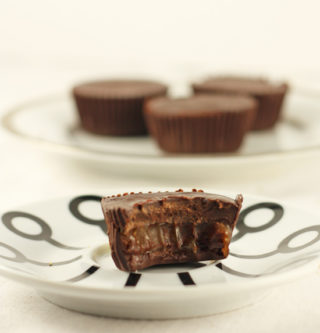
I absolutely adore chocolate filled with oozing gooey caramel, so for these chocolates I made the caramel the consistency of a thick caramel sauce (like the kind you would top ice cream with.) The great thing about the texture of these chocolates is that you can eat them chilled if you want the caramel filling to be firm and chewy (like in the picture), or enjoy them at room temperature for an oozing liquid center that might make a bit more of a mess but will be so delicious no one will care.
To make this candy easier (I was feeling a bit lazy) I made them without tempering the chocolate. This means that they must be stored in the refrigerator and brought to room temperature right before serving. If you want them to be stable at room temperature simply leave out the shortening and temper the dark chocolate instead of just melting it.
Recipe Updates – Delivered Fresh!
Related Recipes
Chocolate Caramel Cups
June 1, 2014
Ingredients & Instructions
Ingredients & Quantities
Caramel Sauce
- 1 can coconut milk, refrigerated at least a few hours or overnight*
- 1/3 cup (2.7 oz) water
- 1 cup (7.5 oz) sugar
- 1/2 cup (4 oz) dark brown sugar
- 2 teaspoons flaky salt
Chocolate Cups
- 1 1/2 pounds dark chocolate, finely chopped
- 1/4 cup organic palm shortening
- 3 dozen mini cupcake liners
Preparation Instructions
Remove the coconut milk from the refrigerator but do not shake it. Carefully open the can and spoon out the thick cream on top. Place 7 ounces of the coconut cream in a medium sauce pan. (There should be enough from one can to get 7 ounces, if not use a second can of coconut milk). Add the rest of the ingredients except the salt to the pan. Stir to combine the ingredients. Place the saucepan over medium heat and cook until the temperature reaches 228. Remove from the heat, stir in the salt, and let the caramel cool to room temperature. (This is important. If the caramel is hot it will melt the chocolate making a huge, though rather delicious, mess). The caramel can be made up to a week in advance. Store it in an airtight jar in the refrigerator. Bring it back to room temperature before continuing.
Cooking Instructions
Place the chocolate and the shortening in a microwave safe bowl. Heat at 50% power for 90 seconds. Stir the chocolate and return to the microwave. Heat again at 50% power for another seconds. Stir. Continue heating the mixture at 50% power, stirring every 30 seconds until the chocolate is mostly melted. Remove the bowl from the microwave and stir until the chocolate is completely smooth and melted.
Place the cupcake liners on a baking tray. Spoon a teaspoon of chocolate into each of the cupcake liners. Use the back of the spoon the spread the chocolate all the way up the sides. Make sure the sides are completely coated. Place the tray in the refrigerator until set, about ten minutes. Remove them from the refrigerator and check to make sure there are no holes in the coating. If there are patch them with a bit more chocolate and refrigerate until set. Once the cups are set remove them from the refrigerator. Spoon a scant tablespoon of caramel into each cup (it should be 3/4 full.) Top with additional melted chocolate, filling each cup to the top. (If the chocolate has cooled too much microwave it at 50% in 15 second intervals until it is melted and fluid again.) Refrigerate the caramel cups until set.
Store in an airtight container in the refrigerator. Serve chilled or bring to room temperature before serving.
Note: There may be some caramel leftover. Use it as a topping for ice cream or stir a spoonful into hot coffee. (Or just eat it with a spoon from the jar, I won’t tell)
Recipe Details
Recipe Times
Prep
N/A
Cook
N/A
Total
N/A
Recipe Yield
3 dozen
Recipe Categories

Chocolate Caramel Cups
June 1, 2014
Recipe Details
Recipe Yield
3 dozen
Prep Time
N/A
Cook Time
N/A
Total Time
N/A
Ingredients & Quantities
Caramel Sauce
- 1 can coconut milk, refrigerated at least a few hours or overnight*
- 1/3 cup (2.7 oz) water
- 1 cup (7.5 oz) sugar
- 1/2 cup (4 oz) dark brown sugar
- 2 teaspoons flaky salt
*This should be enough to yield enough coconut cream, but it might not hurt to refrigerate an extra can just in case
Chocolate Cups
- 1 1/2 pounds dark chocolate, finely chopped
- 1/4 cup organic palm shortening
- 3 dozen mini cupcake liners
Preparation & Cooking
Preparation
Remove the coconut milk from the refrigerator but do not shake it. Carefully open the can and spoon out the thick cream on top. Place 7 ounces of the coconut cream in a medium sauce pan. (There should be enough from one can to get 7 ounces, if not use a second can of coconut milk). Add the rest of the ingredients except the salt to the pan. Stir to combine the ingredients. Place the saucepan over medium heat and cook until the temperature reaches 228. Remove from the heat, stir in the salt, and let the caramel cool to room temperature. (This is important. If the caramel is hot it will melt the chocolate making a huge, though rather delicious, mess). The caramel can be made up to a week in advance. Store it in an airtight jar in the refrigerator. Bring it back to room temperature before continuing.
Cooking
Place the chocolate and the shortening in a microwave safe bowl. Heat at 50% power for 90 seconds. Stir the chocolate and return to the microwave. Heat again at 50% power for another seconds. Stir. Continue heating the mixture at 50% power, stirring every 30 seconds until the chocolate is mostly melted. Remove the bowl from the microwave and stir until the chocolate is completely smooth and melted.
Place the cupcake liners on a baking tray. Spoon a teaspoon of chocolate into each of the cupcake liners. Use the back of the spoon the spread the chocolate all the way up the sides. Make sure the sides are completely coated. Place the tray in the refrigerator until set, about ten minutes. Remove them from the refrigerator and check to make sure there are no holes in the coating. If there are patch them with a bit more chocolate and refrigerate until set. Once the cups are set remove them from the refrigerator. Spoon a scant tablespoon of caramel into each cup (it should be 3/4 full.) Top with additional melted chocolate, filling each cup to the top. (If the chocolate has cooled too much microwave it at 50% in 15 second intervals until it is melted and fluid again.) Refrigerate the caramel cups until set.
Store in an airtight container in the refrigerator. Serve chilled or bring to room temperature before serving.
Note: There may be some caramel leftover. Use it as a topping for ice cream or stir a spoonful into hot coffee. (Or just eat it with a spoon from the jar, I won’t tell)
Thank You For Printing This Recipe! Visit Us Again Soon!
Recipe Page: https://www.couldntbeparve.com/recipe/chocolate-caramel-cups/


such easy simple ingredients for something so decadent!! Must try!
Wow . . . . so interesting about the coconut water at the bottom giving the sour taste. I have also always wanted a parve caramel and could never get it completely to my satisfaction with coconut milk or coconut oil. Must try this!
If you try it please let me know what you think. I know you have discerning tastes so I would love to know if you like the caramel as much as I did.
Wow. Very good. I have it in the fridge now.
I couldn’t lay my hands on my dark brown sugar, so I changed the recipe around a bit. I caramelized the white sugar (7.5 ounces) and then added the 1/3 cup water to stop the caramel from continuing to brown. Then I added the coconut milk and 3 ounces of sugar and carried on with cooking it. I only added 1/2 tsp. salt and, when it was cooled down, I added in a teaspoon of vanilla.
Parve caramel success at last! Thank you.
I’m so glad you liked it! Glad to know that it works with the white sugar, I am going to have to try it that way next.
The caramel I made with the caramelized sugar is not quite as firm as a caramel candy–I think it is a little too soft to shape into wrapped candies. I think that the caramelization process alters the sugar past the point of being able to make a chewy syrup and all the chewiness of the caramel comes from the second batch of sugar added (I think). Also, I added only 3 ounces more of sugar instead of the full amount. I wanted something I could spoon out of a container, so I don’t care, but I thought I should share that about the final texture.
Made with the combination of brown and white sugar, you can cut your caramel into squares and wrap them?
No, this recipe is for a thick caramel sauce, like a thick ice cream sauce. It is perfect for molded candies like these chocolate caramel cups but still too soft to cut. I am still experimenting with a parve caramel that can be served cut into squares. This recipe gets too hawed when cooked to normal caramel candy temperatures so I am still experimenting.
Oh, ok. So, then I got the same texture with caramelizing the sugar that I would have with using the mix of brown sugar and white sugar. The flavor with the caramelized sugar is really fantastic, very much like dairy caramel sauce.
I also love to add flaky salt to my sweet desserts – you couldn’ve called them salted caramel or has that trend already passed? #keepingupwiththetrends
what in the world is flakey salt?
It is salt that is in bigger flakes rather than small crystals. I usually use fleur de sel but maldon sea salt works too.
Can I use this caramel to make caramel covered apples?
Thanks
No, I don’t think it would work. It is a much thinner consistency, like a thick caramel sauce, so I imagine it would just slide off the apples. You could serve it as a dip alongside apples if you wanted, that would work well.
Trader Joe’s sells cans of coconut cream. It’s just like the stuff at the top of the can, except there’s very little or even none of the milk that separates out. It’s incredible stuff.
I don’t recall offhand whether it had a heksher on it, but as I recall, coconut milk was one of the things that could be used without supervision. Let me see….
http://www.kosherquest.org/getfood.php?id=2090
On the other hand, this brand is certified. I’ve never used it and I don’t recognize the heksher, though.
http://www.amazon.com/Native-Forest-Organic-Premium-Unsweetened/dp/B00AF7XMYY
No harm to trying it, though. Right? Of course, there’s always the BIG can!
http://www.amazon.com/Native-Forest-Organic-Coconut-Cream/dp/B00F6MQRO0/ref=pd_sim_325_4?ie=UTF8&dpID=51sWE7fFdRL&dpSrc=sims&preST=_AC_UL160_SR132%2C160_&refRID=0KFX6CZGJPVMXBFRJW24
That would make lots of caramels!!!
OH, and I’ve heard good things about this brand, too.
http://www.wildernessfamilynaturals.com/product/kosher-products-coconut/CCO330.php
http://www.wildernessfamilynaturals.com/product/kosher-products-coconut/CMBCM22-1.php
Thanks for all these great suggestions! I use the Native Forest coconut milk but have never seen the cream! That would save me from trying to figure out what to do with the leftover thin coconut milk (although that giant can might be a bit more than I could handle)!